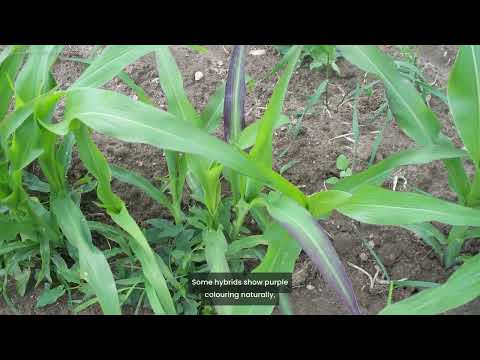
Drip irrigation puts water, drop by drop, right where the roots are. Instead of flooding a whole field or spraying water into the air,
small emitters release a few litres an hour into the soil beside each plant. Well designed and well run, a drip system can deliver around ninety percent of the water it pumps to the root zone, against roughly fifty to seventy percent for good surface irrigation.
Leaves stay dry, so many leaf diseases are less of a problem.
Weeds between the rows get less water. And fertiliser can be fed through the same pipes, little and often.
Drip is not magic, and it does need care.
In this video: the parts of a drip system, choosing emitters and spacing for your soil, how long to run it, feeding fertiliser through it, preventing clogging, and a simple test to check that every plant is getting its share. The principles are the same for vegetables,
orchards, vineyards, sugarcane or cotton, anywhere in the world.
Follow the water from the source.
First the pump, or a tank high enough to give pressure. Then a backflow preventer, so that water with fertiliser in it can never flow back into a well or a drinking supply.
Next comes the filter, the heart of the system, because emitter openings are tiny.
Screen or disc filters suit fairly clean well water. Surface water from a canal or pond, with algae and organic matter, usually needs a sand media filter first.
After the filter come a pressure regulator and a pressure gauge,
and the fertiliser injector, often a venturi or a pressure tank. Then the mainline carries water to the field,
submains and valves divide it into blocks, and laterals run along the rows.
Laterals are either thin-walled drip tape, common for vegetables and other annual crops, or thicker drip line with emitters built in, used for orchards and multi-year crops. At the far end of each lateral, an end cap or flush valve lets you flush out dirt, and air valves at high points let air in and out of the pipes.
Most emitters deliver between about one and four litres per hour.
Pressure-compensating emitters give nearly the same flow over a range of pressures, which helps on slopes and long rows.
Non-compensating emitters are cheaper, and work well on flat, short runs.
Space the emitters to match your soil.
Water moves sideways much further in clay than in sand. In a sandy soil, the wetted zone under an emitter is narrow and deep,
so emitters must be close together, often twenty to thirty centimetres apart, to form a continuous wet strip along the row. In a loam or clay, they can be thirty to sixty centimetres apart. Dig a small pit across the row a few hours after an irrigation,
and look at the wet pattern. It is the quickest way to see whether the roots are getting water where they grow.
How much water does the crop need?
Crop water use is often estimated as the reference evapotranspiration for your area, from a weather service, times a crop coefficient for your crop and its growth stage. One millimetre of water over one hectare is ten cubic metres, or ten thousand litres.
Here is a worked example.
Your tomato crop is using five millimetres a day. The rows are one metre apart and the emitters are thirty centimetres apart, so each emitter serves zero point three square metres. Five millimetres over zero point three square metres is one and a half litres per emitter per day.
Allow for a system efficiency of ninety percent, and you need about one point seven litres. With emitters that deliver one litre per hour,
run the system for about one hour and forty minutes a day.
That is a starting point.
Because drip wets only part of the soil, it is usually run often, daily or every few days, in shorter sets.
Check the soil at root depth with a probe, a tensiometer or simply by feel, and adjust.
In salty water or soil, salts collect at the edges of the wetted zone. Rain can wash them back towards the roots, so an occasional longer irrigation to leach them deeper may be needed.
Fertigation means feeding fertiliser through the drip system.
It lets you give nitrogen and potassium in small doses, matched to the crop's growth, right into the root zone.
Use only fully soluble fertilisers, and dissolve them completely before injecting.
Run the system with plain water first, until it is fully pressurised.
Inject the fertiliser in the middle part of the irrigation, then finish with plain water to flush the lines, so no fertiliser is left to feed algae or form deposits.
Never mix fertilisers that react.
Calcium fertilisers, for example, form insoluble deposits with phosphates and sulphates, which block emitters. If in doubt, test the mix in a jar of your irrigation water first.
And always have that backflow preventer in place.
Clogging is the most common reason drip systems fail. It comes in three forms.
Physical clogging from sand, silt and debris.
Chemical clogging, when calcium carbonate, iron or other minerals come out of the water and form scale.
And biological clogging, from algae and bacterial slime. Have your water tested before you design the system, for suspended solids, pH, hardness, iron and bacteria, so that you choose the right filter and treatment.
Then keep up a routine. Clean the filter whenever the pressure difference across it rises beyond the maker's limit; many filters have a gauge on each side. Flush the laterals regularly by opening the ends until the water runs clear, more often with dirty water. Where scale is a problem, an acid treatment that lowers the water's pH can dissolve carbonate deposits.
Where slime or algae build up, chlorination is used. Both must be done carefully, following product instructions and safety rules, because the chemicals are hazardous.
A drip system can slowly drift out of balance, with plants at the end of the rows getting far less than plants near the valve.
Check it at least once a season with a simple cup test. With the system running at normal pressure, place a cup under an emitter for exactly one minute, measure the water in millilitres, and multiply by sixty.
That is the flow in millilitres per hour. Divide by a thousand for litres per hour.
Do this at the start, middle and end of a few laterals, near and far from the valve.
If the flows are within about ten percent of each other, the system is in good shape. If the far ends are low, check the pressure at the end of the lines, look for leaks, kinked tape, blocked emitters or a dirty filter, and flush.
Walk the field during irrigation, too.
Puddles mean leaks or bursts; dry spots mean blockages.
Rodents and insects chew drip tape, so fix holes promptly.
Drip costs more to install than surface irrigation,
and it takes more management.
The payback comes from saving water and energy, saving fertiliser, higher and more even yields, and often better quality, especially in vegetables, fruit and other high-value crops.
Where water is scarce or expensive, or the land is uneven,
drip is often the only way to irrigate well.
Many governments support micro-irrigation with grants or subsidies, so ask your local agriculture office what is available before you buy.
And buy from a supplier who will design the system for your water, soil and crop, and who will still be there when you need spare parts.
To recap.
Every drip system needs a backflow preventer, a good filter, pressure control and a way to flush the lines.
Choose emitters and spacing for your soil: closer in sand, wider in clay.
Work out the run time from the crop's water use, the area each emitter serves and its flow, then check the soil and adjust.
Fertigate with soluble fertilisers in the middle of the irrigation, and flush after.
Prevent clogging with water testing, filter cleaning and regular flushing.
And do the one-minute cup test at least once a season.
For more on irrigation and every crop, visit laisha.ai. Thank you for watching.